Become an affiliate writer - http://www.iwriter.com/affiliate/233798

Wednesday, December 30, 2015

Christmas project 2015

It's that festive time of year again when craftsters get creative! :-)

This year's upcycling project for office gifts for my colleagues involved small round plastic containers - the kind that you tend to accumulate when you shop for nuts, dried fruits or other condiments.

Instead of throwing them away to languish in a landfill for eternity, I decided to repurpose them into colourful containers in which to put chocolates. All decorations were made out of leftovers from last year's christmas wrappers and some red crepe paper. Craft punchers and stencils were used to shape the embellishments such as stars and christmas trees.

Sunday, October 04, 2015

How to upcycle a normal paper bag into a gift bag

A lot of the stuff we buy from the department store comes in a paper bag. Sometimes (not always!:-) these bags are pretty sturdy and of good quality, plain in colour, with a handle.

Perfect in fact, for giving gifts in. It seems a waste to just throw these bags away, especially since we often end up buying plain paper gift bags, to put gifts and other stuff in.

Then again, these bags often have logos, slogans or store advertisements on them, so they may not be suitable as gift bags. Hmmm....

Then I got the idea to use paper scraps and cuttings, basically the stuff I use to make cards, to decorate paper bags as well - thereby creating my own personalised gift bags!

First, hunt down some paper cuttings and scraps that match the background colour of the bag, and then cut out shapes that are large enough to obliterate any visible logos, slogans or other markings. You may want to keep some of the existing designs on the gift bag visible, if they kind of "blend in" with your paper scraps. Stick them on with glue or cellophane tape, secure them in place by covering them with strips of cellophane tape, and ...voila! Your own upcycled personalised gift bag!  :-)


Thursday, August 20, 2015

How to decorate a tea-light jar with mehndi designs

Tried my hand at another variation of jar-decorating - adding a tea-light!

First, I prepped the jars by washing them, removing the labels and drying them thoroughly.

Next step, use a sponge dipped in glass paint and apply all over the jar to create an even, speckled look. This is so that there'll be a background colour, but you could also skip this step if you have a very smooth, clean jar surface.

Now, you'll need some designs. There is lots of inspiration to be had on Pinterest, Youtube and on the net in general. Besides  tutorials, you can also look at the kinds of decorations others have used on their tea-light jars. The easiest thing to do would be to download some mehndi designs from the net, and practice drawing them on paper first with a pen or pencil.

Finally, once you've identified your design and practiced drawing it, transfer the design onto your jar using a black glass painting pen (these are available at craft stores). The thinner the tip, the more elaborate the design you can pull off. I had to make do with simpler designs as I couldn't find a really thin-tipped pen :-)

It can be a bit challenging to draw on a surface that's not smooth or has already been painted on. One tip would be to make sure the ink is always flowing freely on your pen. If it feels like it's drying out, stop, shake the pen and test it on a piece of paper to get the ink flowing again.

If it's a tall jar, you'll need to put in a filler - stones, shells, marbles, dried spices, anything you fancy - before dropping in the tea light or else, the candle will just go out once it reaches the bottom of the jar! :-)


Thursday, August 06, 2015

How to use old photographs to personalise handmade cards

Recently, I was going through my collection of landscape photographs and hit upon the idea of using some of those images to personalise my handmade cards.In the digital era, anyone with a smartphone can accumulate thousands of images in a short span of time.

But what does one do with all those photos?? More often than not, the answer is nothing :-)

How about this - every week (or every month) take some time to curate your images. Select a few and get them developed/printed. If it's an image that you really like, get a few copies made of the same photo.

Use them to personalise handmade cards. Crop the photograph to fit the space designated for it on the card you are making. The result? A card that is truly personalised... rest assured no one else could have taken quite the same photograph in quite the same way! It's also a wonderful way to rekindle happy memories of the past.

In this card I used an old photo I took years ago, of a beautiful seashell I found nestled in the sand on a beach. The image was cropped to fit the inside of the card  using craft scissors to create a decorative border. The other photos are of the other pages of the card.


Sunday, July 19, 2015

How to upcycle plastic containers

Plastic containers…in Malaysia, they’re everywhere. There is no escape. Almost every product you buy is packed in some kind of plastic container. Round, square, rectangular shaped, cup-shaped… there seems to be a perfect-sized plastic container to suit just about every need and occasion! :-)

The question is, what happens to these plastic containers after the food inside them is consumed? Well, they can be recycled to an extent ie. washed out and re-used for storage and other purposes. But seriously, this can only be done for a while as there are only so many plastic containers every household needs! The number of containers coming in usually far exceeds the number of containers going out – so after a while, to avoid literally swimming in plastic containers, one ends up having to dispose of them. And it’s not always convenient to locate a reliable recycling centre or drop-off point, so they might just end up in a landfill somewhere.

So is there anything else one can do with them?

One suggestion is decorate them and use them to put gifts or other items such as notebooks or craft items into. For paper crafters, pieces of scrap paper left over from other projects would be the obvious go-to decorative item. All you’ll need is some craft scissors, glue, cello-tape and scrap paper.

I’m sure quilters and people who work with other materials such as cloth and mixed media materials, would find other items to decorate the containers with. This is not just a good way to use up scrap bits of paper, cloth and other items, but also a way to turn plain plastic containers into reusable decorative or functional items.

A great project for kids too.


Sunday, January 25, 2015

How to make cloth bags and cloth wrapping

Fabric is the new paper!

Well, not exactly. The Japanese have been using it to wrap gifts and make all sorts of accessories like bags and headwear, for centuries. They call it "furoshiki". And as with all things Japanese, the ideas and designs are gorgeous and creative.

Inspired by this website I came across, I tried my hand at a few. http://furoshiki.com/techniques

The more complex furoshiki designs seem to be made using a special stretchable cloth (which I don't have) - but a bit of research revealed that people use all sorts of different kinds of cloth and still get pretty good results. So I tried it with saree material using squares of material from old sarees which have become brittle and tear easily. The ivory-coloured cloth was left over from some curtains I got made! :-)

The bag was easily made by cutting out 2 pieces of cloth, sewing in the seams or rather hemming it and turning the bag inside out. The string was attached by tying it around the top, folding the cloth down and sewing the seam around it. Don't forget to tie a knot though or the string might disappear in the seam :-)


Saturday, January 10, 2015

How to make a paper quilt card

I've always been entranced by paper quilts. (Also by fabric quilts, but those always looked like a lot of work so I've never tried my hand at making one! :-)

Watched a couple of online tutorials on paper quilts and decided to try my hand at making one. And to also make it double up as a homemade card.

Step 1, buy a blank card. (You could also make this out of existing card-like material, if you had any). Bear in mind that buying one might be a better idea as you could also get a matching, correctly-sized envelope.

Step 2, gather your materials. You'll need scissors, cello tape, scrap paper and other embellishments.  For this simple quilt I chose a selection of patterned designs that I clipped out of a used journal. Using a craft scissors, I cut the edges off the paper to create oblong-shaped pieces.

Step 3, arrange the pieces of scrap paper onto the quilt. I laid out the pieces in an overlapping design on the front page of the card.

Step 4, secure the scrap paper onto the card. There could be many ways of doing this but I tend to find that the good old cellophane tape method works best. Cover the entire card with strips of cellophane and trip the edges, folding any excess into the card to create a smooth finish around the edges.


Thursday, January 01, 2015

How to decorate christmas gift bags

Yes, it's the Most Wonderful Time of the Year, again! Christmas 2014.

Do you have a large group of people you'd like to give something to for Christmas, but you can't think of what to give exactly? 

It could be a group of colleagues, friends, your kid’s classmates, family members or just about anyone. You’d like something a little personalised, but at the same time, not too difficult to make – since Christmas is such a busy time! J

I have just the solution for you – how about small plain or patterned gift bags (these can be bought at a store for very little in terms of cash outlay) which you can decorate with handmade Christmas-themed motifs before filling them up with sweets, chocolates or other goodies?

These gift bags make for both personalised and homemade gifts, while at the same time, have the added benefit of being pretty easy to make and fill.

OK, so if you’re thinking about doing something like these next Christmas, tip no. 1 is to start gathering your supplies now itself. You'll need to save all cards, gift tags, wrappers, ribbons and other potential christmas craft materials and store them in a box or a folder.

Keep adding to the collection throughout the year, whenever you come across a piece of paper, fabric or other embellishment that fits with your design palette for the bags. Just about anything which is the right colour, can be worked into your design. 

The next step is to purchase the paper bags. (You could of course make your own, for an extra challenge!)J

For consistency, I'd suggest covering all the paper bags with the same wrapper. This not only makes the bags look great when placed to next to each other, but also serves to cover up any “not-so-pretty” pre-printed designs on the bag itself.

Once the basic cover is on, the rest of the décor for each bag is entirely up to you. For the examples below, I used a range of craft materials to decorate each bag with a unique design. All materials used were recycled from previous Christmas gifts, cards, ribbons and wrappers. Only the paper bags and the goodies stuffed inside, were store-bought.


Personalised gift bags can be used for other occasions too! See what designs you can come up with! J


Thursday, November 27, 2014

How to make homemade cards

We are surrounded by paper. We get cards, brochures, booklets and other promotional material every day. What does one do with all that paper?

You could of course, just throw all of it away.

But you could also put these materials to a more creative use.

How about trying your hand at home-made cards?

With a bit of simple background prep, a scissors (and a craft scissors and craft punchers if you have them), cello tape and good old-fashioned glue, all that unwanted paper can transform into a personalised expression of your creativity.

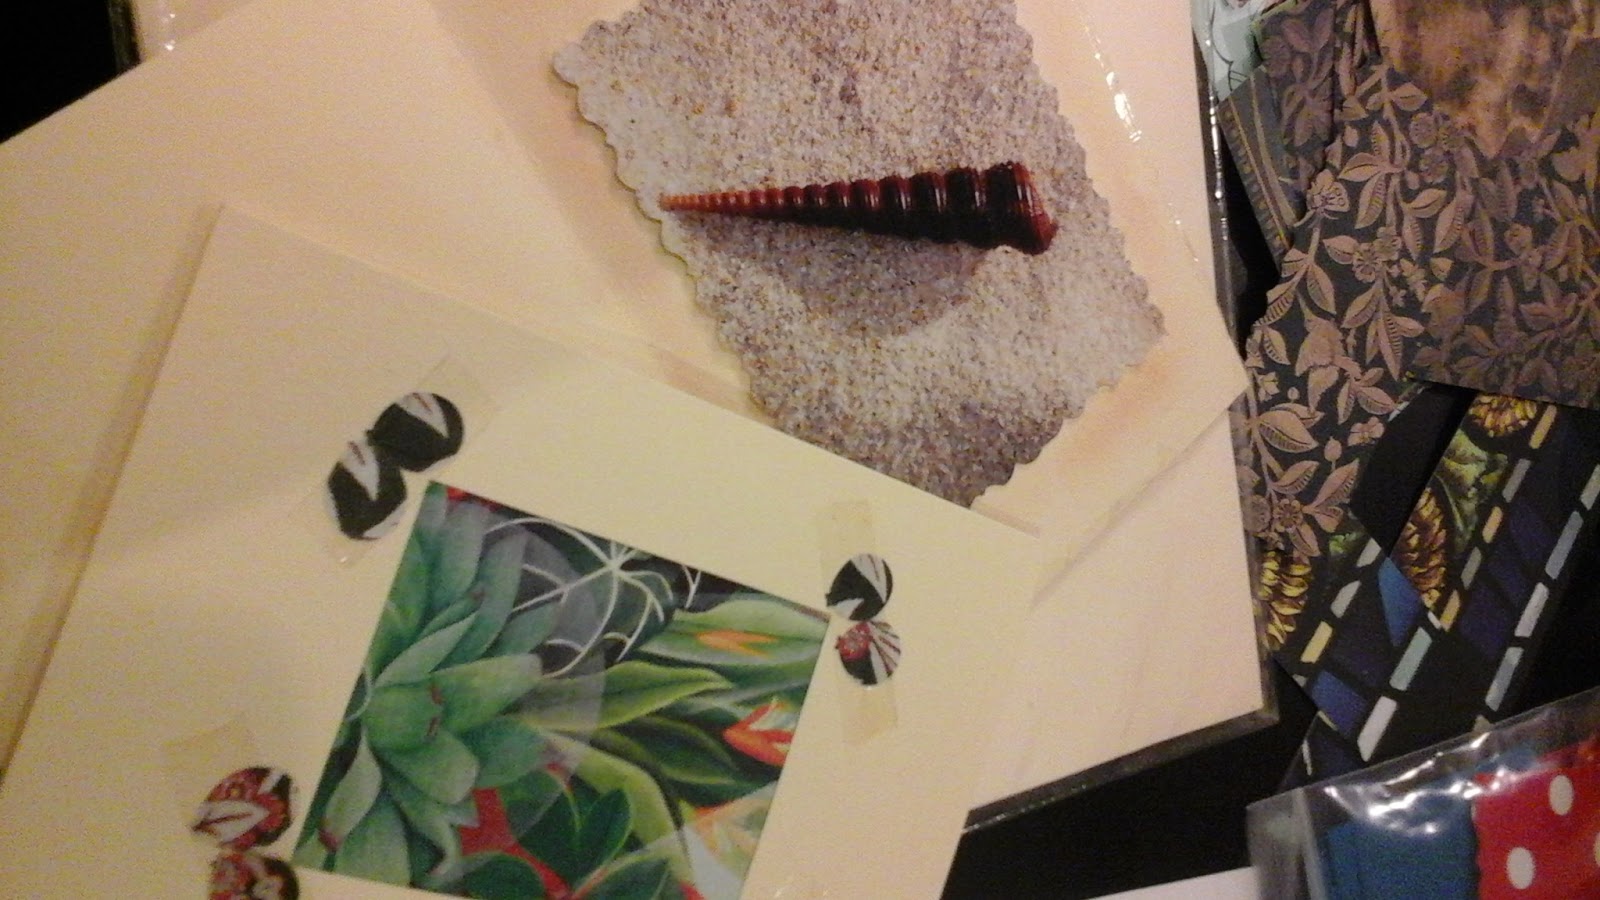
What do I mean by background prep? OK, get an empty box and keep it in an easy-to-reach spot (preferably on your desk, or close to the area where you sort through your mail). Get a scissors and put it on top of, or in, the box.

When you get a card, booklet, brochure or other promotional item, check whether there any interesting designs, unusual colours or textures, or patterns. If so, cut them out with the scissors and put the clippings in your box. Throw the unwanted bits (these would usually be the parts with text on them, or where the product advertisements are visible).

Not long from now, you'll have a box full of interesting clippings which you can use to decorate your homemade cards.

How to make the card

Start with a piece of paper folded in half. Ideally, this should be a thick piece of store-bought paper. Ordinary paper might prove too flimsy.

Open your box and select the paper clippings that you will use. Pay attention to colour schemes and layout. Think about your design and look for pieces that can make your vision a reality.

At this point, craft punchers and craft scissors can be used to create interesting cut out shapes and stylised edges, to the clippings. It adds to the versatility of each piece, though not an essential step.

Stick the clippings on the paper in the desired arrangement, using a glue stick.

Allow to dry.

As a finishing touch and to ensure that the bits don't dry up and peel off, use cello tape to cover every inch of the surface of the card, and trim off any excess strips around all the card with a scissors.


Tuesday, November 04, 2014

How to upcycle a used jar

There really is no limit to what you can do with all those empty coffee jars and jam jars. They actually make quite a decent receptacle for a pot plant that you plan to give away as a gift. However, the trick is not to over-water. Plants can't survive in waterlogged soil. So since a jar has no drainage, you'll need to water very, very sparingly. I usually paint or decorate my jars, but wrapping them in scrap fabric also adds a nice touch.

Monday, October 20, 2014

Check out some of these e-books on how to craft a range of projects! Click Here!

Sunday, October 19, 2014

Collecting designs and patterns

Often, a gorgeous pattern or design jumps out at me from a card, a brochure, or a magazine. I'm then inspired to use that pattern or design in one of my craft projects. So I'll either cut out the design or pattern, or copy it out onto a piece of blank white paper by drawing with a pencil. I have a special notebook in which I keep all the patterns and designs I've collected. Try doing the same and you'll probably find lots of inspiration for your future projects, everytime you look through your collection! :-) Here are some mehndi designs I copied from a wedding invitation. I used some of them on my last batch of decorated jars.

Wednesday, October 08, 2014

71838deaabb5ec3b3c4f168d421cda60cf176e546860f5f708

Monday, August 18, 2014

More Jar Crafts..

More jars in which to house water plants, and experiments with different types of design... ranging from tile grout and crayon, to sponging glass paint onto the surface and tracing patterns with a glass paint pen. Any indelible marker would do as long as it's waterproof. Black is probably the best colour so that patterns can be clearly seen.

For inspiration on design, I turned to mehndi patterns. Mehndi is an ancient indian art form in which intricate patterns using henna dye, are traced onto the palms and forearms of brides. It has become really popular amongst all cultures and there are now so many variations on the theme. It's possible to download patterns and designs from the internet, and re-create them using the black marker.

The more artistic you are, the more intricate a pattern you can attempt! :-)


Wednesday, June 19, 2013

Turning jars into pot plants

Recycled jars can be transformed into just about anything...including a pot plant! For this project, I used an old pasta sauce jar. After washing and drying, I covered it with paper cuttings from a brochure that arrived in my mailbox, as I quite liked the design and the paper was nice and thick. To secure the paper cuttings in place over the jar's curved surface, I used strips of cellophane tape. This was also to sort of "waterproof" the jar as water can be wiped off a cellophane-taped surface quite easily without wetting the paper cuttings underneath it.

Warning - this only works for certain plants. Not all can survive in water alone. You'll also need to take a cutting from an existing plant as it's not likely to work with a seed. I did initially hope to be able to put earth in the jar, but found out that without drainage, no plant would be able to survive. So I tried water. That worked pretty well... for this little plant anyway :-)


Tuesday, June 18, 2013

Baby shower scrapbook-cum-album

Here's an idea for a baby shower gift - make a scrapbook and album for the mum-to-be!

To do this, first try to get hold of a large album with fully laminated pages. The kind you can peel upward and re-paste once you've decorated the page. Not that easy to find in these days of digital photos and online albums, I know...they date back to the good old days when people actually printed out their photos and stuck them in albums :-).

Next, plan the project. Ideally, you'd like to give it to the mum-to-be as a gift after the baby shower. So since you'll definitely want photographs, it's best if you take a camera along to the shower so that you can take your own photos (as there may or may not be an official photographer!).

Another quick tip is to get to the venue early so that you can photograph decorations, cakes, party favours, balloons etc, before the arrival of the other guests. Having too many people in a confined space can make it difficult to get the photos that you want. Of course, you'll want a few pictures of the guests as well for the album but photos of the decorations are very important - these will give you the colour scheme from which to choose your embellishments when you decorate the album later on.

So, next step - develop the photos and decide how they should be arranged in the album. Look at the colours that jump out at you. Do you see one main theme, or a combination of colours? Either way, start choosing your embellishments. You have a choice of going out and buying pre-made embellishments from a craft store, or opening what I call a "project box". A project box is basically a shoebox or any box in which you can put scraps of material, papers, pressed flowers, bits of ribbon, coloured cardboard, buttons, or other materials that you've collected to decorate a particular project. Obviously if your project theme is blue, then you'd want to collect blue stuff - you get the idea! :-)


Friday, June 14, 2013

Crafts to make and sell

For those who are interested in turning crafts into more than just a hobby, there are a lot of online resources that can help with this. You can learn more about what sort of crafts sell best, find customers who would want to buy these crafts, as well as how to promote crafts, and they types of crafts that sell, through resources such as this:

Click Here!

Tuesday, June 11, 2013

craftster.org

Today I'd like to share a link to a craft websites that I love checking out....  http://www.craftster.org/

It's a great site to browse for ideas for potential projects, connect with other craftsters and learn more about almost every kind of crafting.


Friday, May 24, 2013

Jar deco projects

An assortment of former jam jars, honey jars, pasta sauce jars and a used olive oil bottle, get upcycled for use as storage containers and vases. Materials used for decoration include glass paint, tile grout and crayons.

Sunday, February 10, 2013

Creative ways to use up leftover tile grout

Leftover tile grout can be used to decorate recycled items as well. Here, these recycled pasta sauce jars and jam jars have been covered with a layer of tile grout before craft items such as beads from broken chains, odd buttons and other items, were embedded into the grout before it set. A crayon was then used to outline the natural ridges that appeared once the tile grout became dry and hard. In the brown jars, acrylic paint was used to cover the jar and tile grout was used to stick on the shell and other items.


Tuesday, January 29, 2013

Using up leftover thread

I discovered a packet full of leftover thread - primarily from old sewing projects - and wondered if there might be a use for them. Turns out bits and pieces of thread can be used to decorate a glass jar or other object - just use glue as a base and finish the project with cellophane tape or another fixer (though presumably anything too wet such as an adhesive spray, will cause the thread to become damp).


Sunday, January 20, 2013

Used gift wrap and ribbon project

If you like the gift wrap and ribbon on a present you've received, there's no need to throw it away once you've opened the gift - you can use the bits and pieces for a craft project.

Here, an old jam jar was first washed and dried, then covered with a coat of mod podge. The gift wrap and ribbon was cut into smaller pieces and stuck onto the jar. A final coat of mod podge holds everything together.


Monday, January 14, 2013

Coffee jar deco

This time, it's a Nescafe bottle....washed and dried, with the labels removed (by soaking the jar in water overnight).

The middle part is wrapping paper, and the material forming the top and bottom border is actually a piece of the strap that used to be part of a straw bag. The strap snapped, so I cut it into pieces and put it aside to use in a craft project. The wrapping paper was cello-taped to the coffee jar and the straw borders are stuck on with double-sided tape.


Xmas Jam Jar

Over Christmas 2012, I tried to figure out a way to use up excess odd-shaped pieces of christmas wrapping paper. Turned out that they were perfect for punching out shapes! Having collected a decent number of sun-shaped cut-outs, I decided to use them to decorate a used jam jar.

The jar was washed out and soaked overnight in water to make removing the labels easier. Once dried, I covered it in gold glitter and stuck on the cut-outs using glue dots to stick them onto the jar.


Upcycling - Shoebox and Mooncake Tin

When Mooncake season rolls around, here's something to do with the rather nice tin they are sometimes packaged in! The same goes for the shoebox that your new shoes come in, provided that the box is sturdy, made of sufficiently thick cardboard, and in good condition.

Most crafsters have scrap paper, old cards, ribbon, cut-outs, scrap cloth and other odds and ends saved for projects such as these. Now's the time to bring them all out!

Once you've decided which materials you want to use on your project, glue, cello-tape or otherwise secure them onto the surface of the box/tin in the desired arrangement. Here, the shoebox is covered with scraps of cloth and the tin is covered with the remnants of birthday and other cards from years gone by. To create a finish, I just cello-taped the surfaces - but any form of fixing would work.

I use the box and tin for...what else...storing craft supplies! :-)